Lesson 1: Introduction to DynRes Docker Cluster
Background
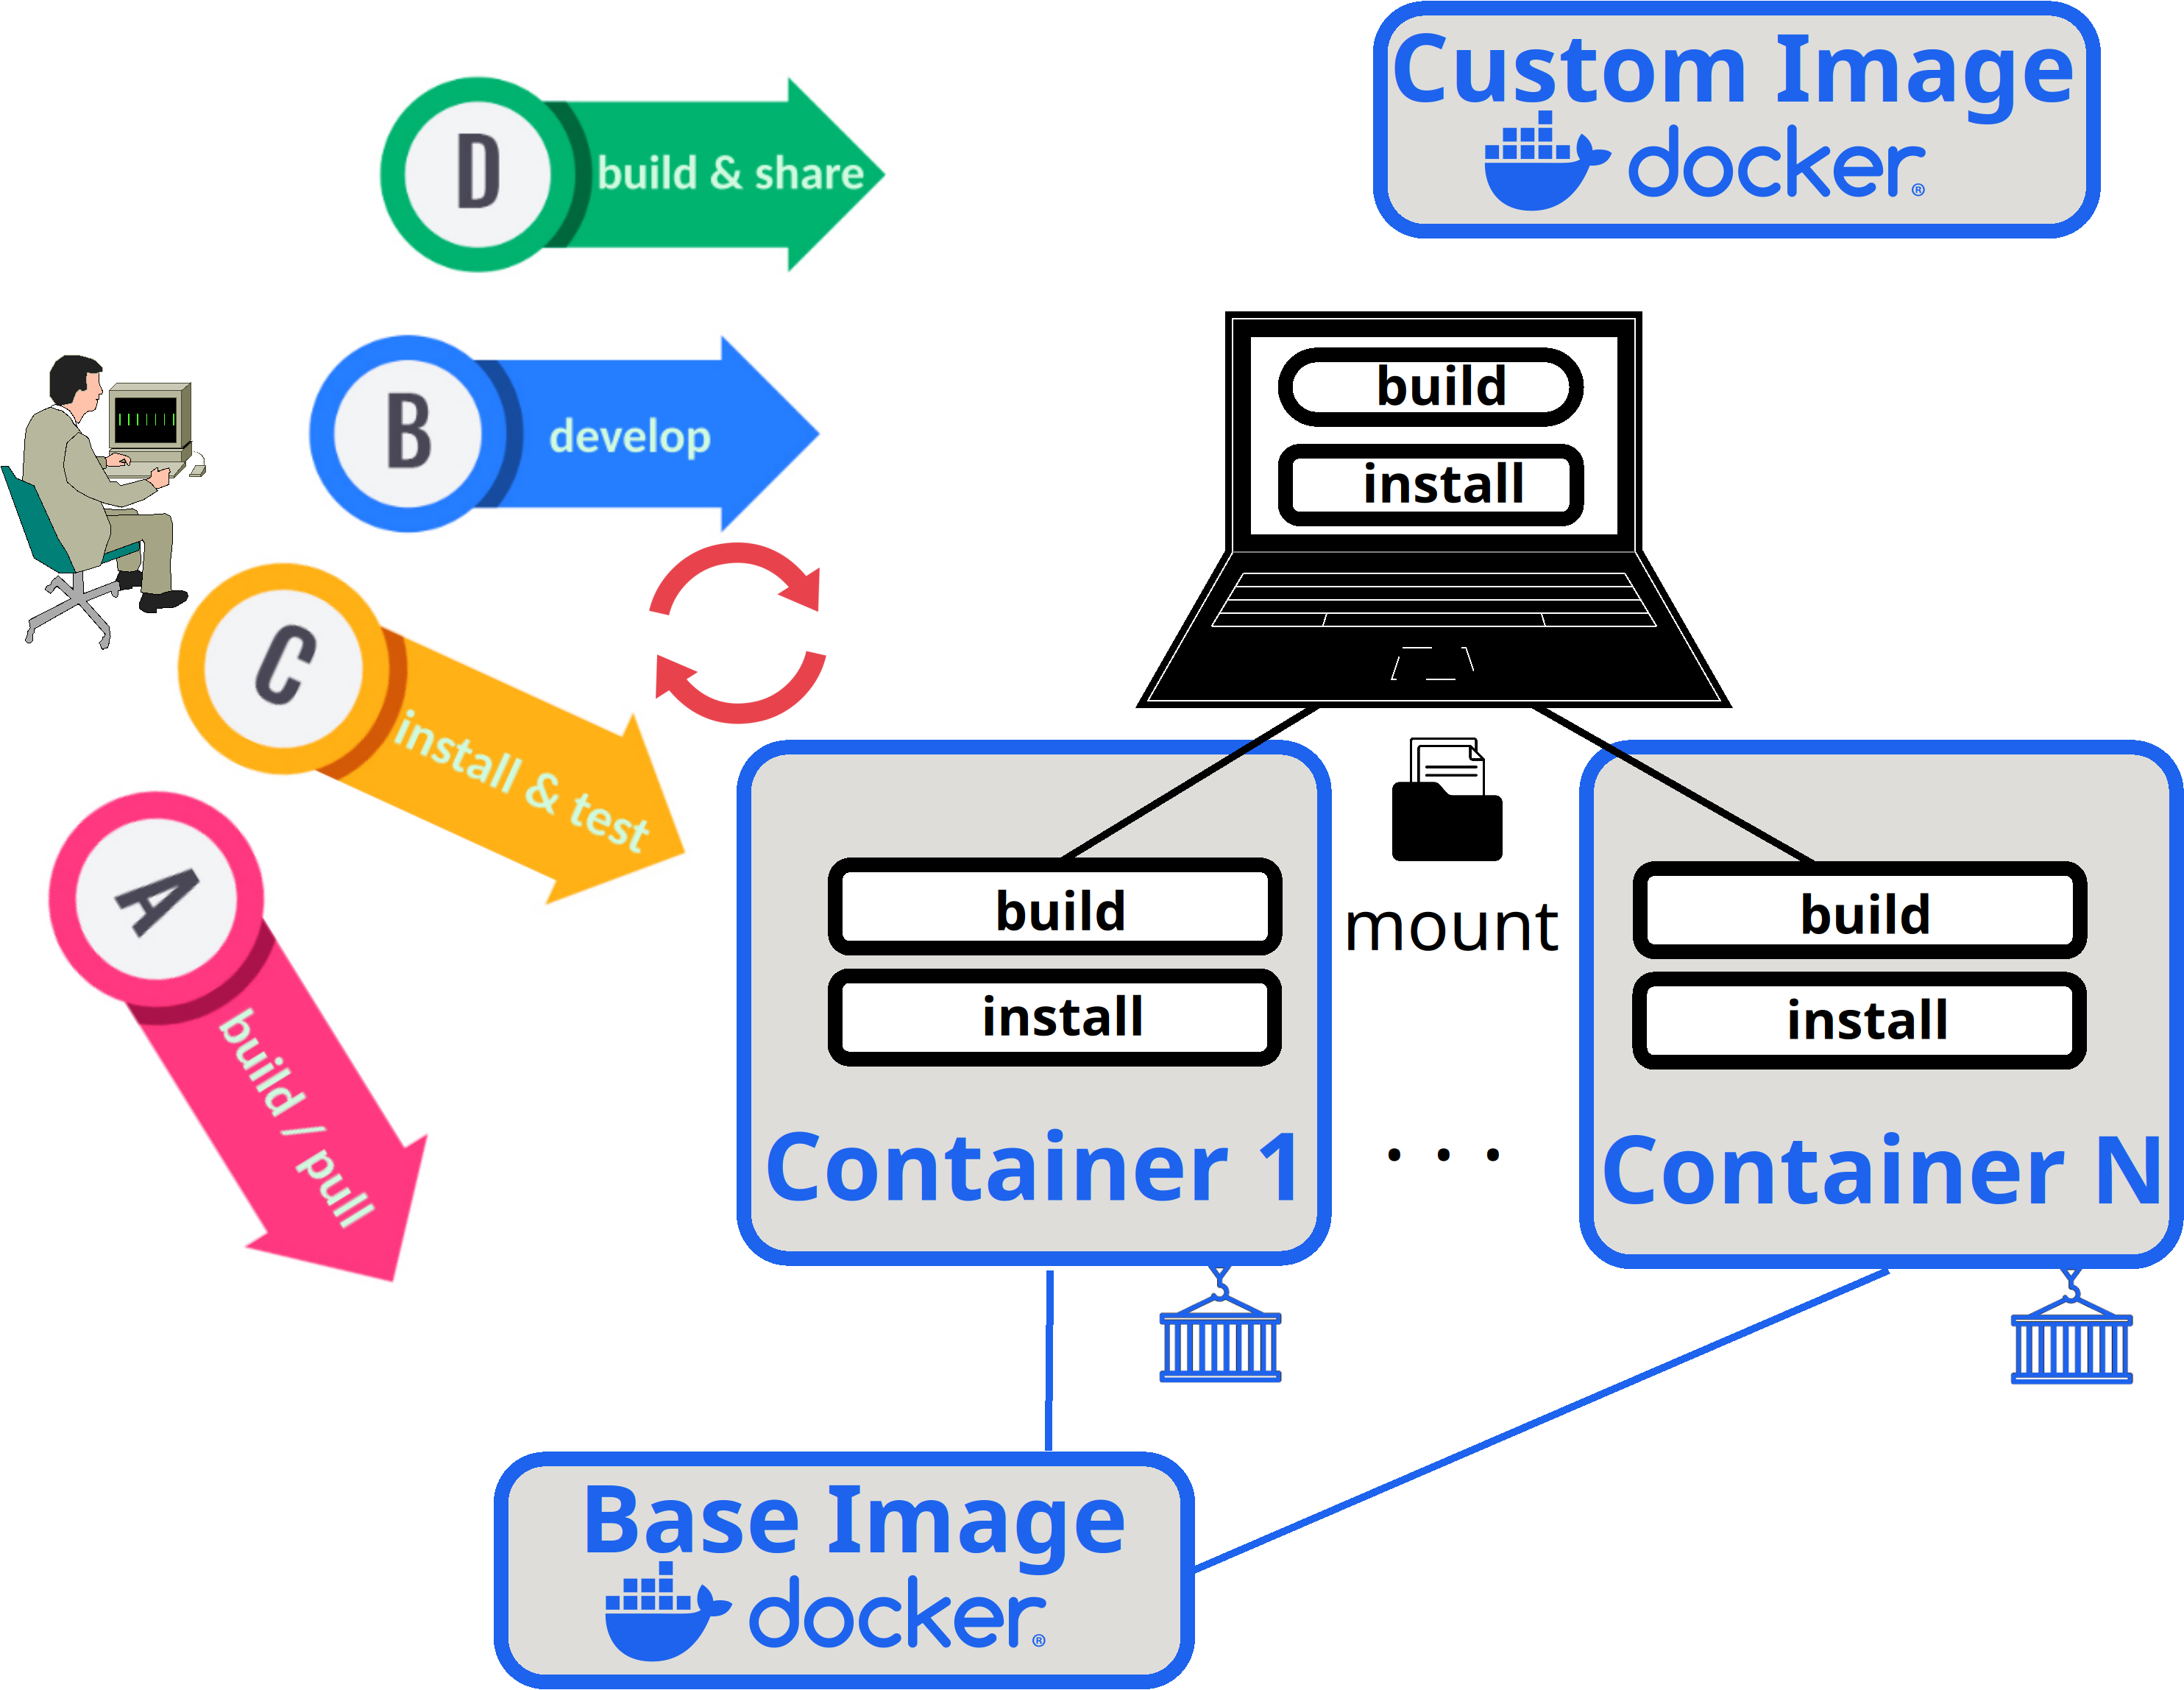
The DynRes Docker Cluster is a containerized environment for local development, testing and collaboration. It is based on previous work by Josh Hursey and Isaias Compres.
Workflow:
The following steps describe a typical workflow when working with the docker cluster:
A: Build or pull a base image and use it to spin up the containers (compute nodes)
B: On your host machine: Do the development in the build directory using your preferred IDE
C: Inside the conatainers: Compile the code from the mounted build dir into the install dir and run functional tests
(Repeat step B + C until satisfied)
D: Build a new custom image including your development and share it
Commands
The docker cluster can be managed with a high and low-level interface. In this tutorial we use the high-level interface. More information can be found in the official documentation.
docker-cluster.sh [OPTIONS]
Options:
    --docker_file=[file]        // path to Dockerfile to use as base image (if set, triggers build)
    --docker_repo=[name]        // Name of dockerhub repo to push/pull images
    --env_install=[env_name]    // Name of Dynpkgs environment to install in the image
    --env_version=[version]     // DynPkgs version to use
    --mode=[mode]               // Image mode: develop (with mount; = default), release (no mount)
    --num_nodes=[N]             // Number of containers to spin up
    --image=[image]             // Name of image to use in containers (overwrites implicit image name)
    --drop_in_host=[host]       // Name of host to drop into (if set, triggers drop in)
Hands-On
1. Clone the docker-cluster repo:
[user@hostmachine some-dir]$ git clone https://gitlab.inria.fr/dynres/dyn-procs/docker-cluster.git
[user@hostmachine some-dir]$ cd docker-cluster
We will use a prebuilt base image.
FYI: The image was built with the following command
[user@hostmachine docker-cluster]$ ./docker-cluster.sh --docker_file=export/base_images/Dockerfile.default --docker_repo=hawkmooneternal --env_install=tutorial_dynreshpc
2. Start and drop-in
We will now use this image to start our cluster and drop into the first node:
[user@hostmachine docker-cluster]$ ./docker-cluster.sh --docker_repo=hawkmooneternal --env_install=tutorial_dynreshpc --num_nodes=9 --drop_in_host=n1
We are now inside of the cluster. The ‘build’ and ‘install’ directories are mounted at ‘/opt/hpc’.
Note: Alternatively we could have explictely specified the image name:
[user@hostmachine docker-cluster]$ ./docker-cluster.sh --image=hawkmooneternal/docker-cluster:default-latest-e-itutorialdynreshpc-v-l-develop --num_nodes=9 --drop_in_host=n1
3. Preinstalled software in mounted dirs
If we inspect these directories we can see that there are already a bunch of packages preinstalled:
[mpiuser@n1 hpc]$ ls /opt/hpc/install
[mpiuser@n1 hpc]$ ls /opt/hpc/build
Lesson 2 will explore the use of the DynPkgs package manager to create, install and deploy such packages.
4. Drop-out and shutdown
For now we are done. Let’s drop out of the cluster:
[mpiuser@n1 dyn_procs_setup]$ exit
The docker cluster can be shut down with the following command:
[user@hostmachine docker-cluster]$ ./docker-cluster.sh --shutdown
Ongoing & Future Work:
Podman backend
GitLab CI